Workflows will help you define the journey your customers will go through after clicking the cancellation button of their subscription.
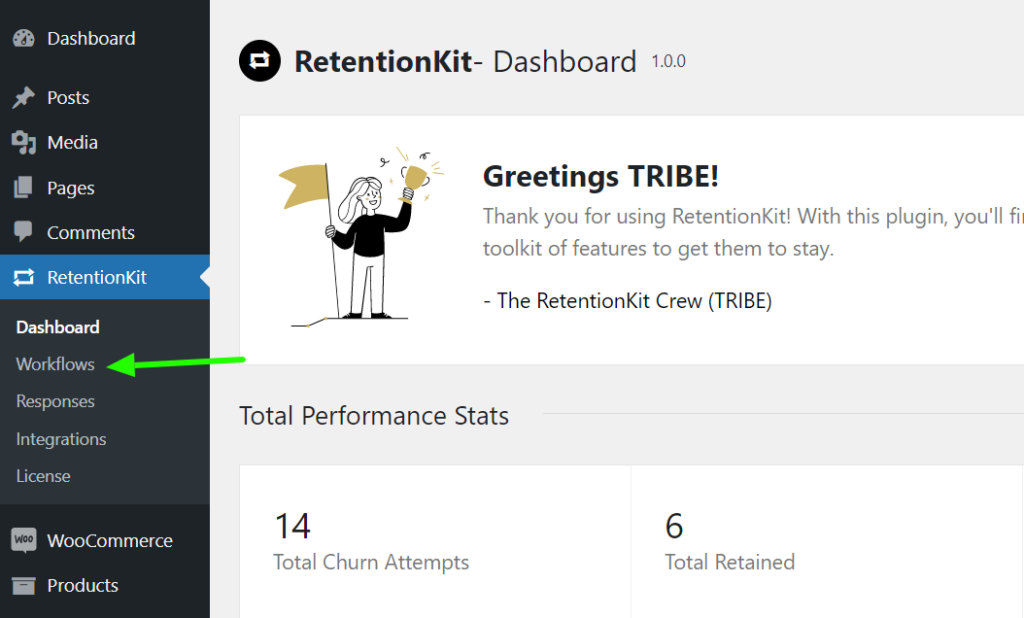
1. Find the “RetentionKit” link in the left navigation bar. Click RetentionKit > Licenses page.
2. Find the “RetentionKit” link in the left navigation bar. Click RetentionKit > Workflows

3. Click Add New and add a title to your flow.

4. Choose which product or products categories you’d like RetentionKit to trigger on. You can add a single product or click add workflow to add more products or exclusions to this workflow.

5. Enable the Survey Step (We strongly recommend to keep this activated to find out the cancellation reasons from your customers)

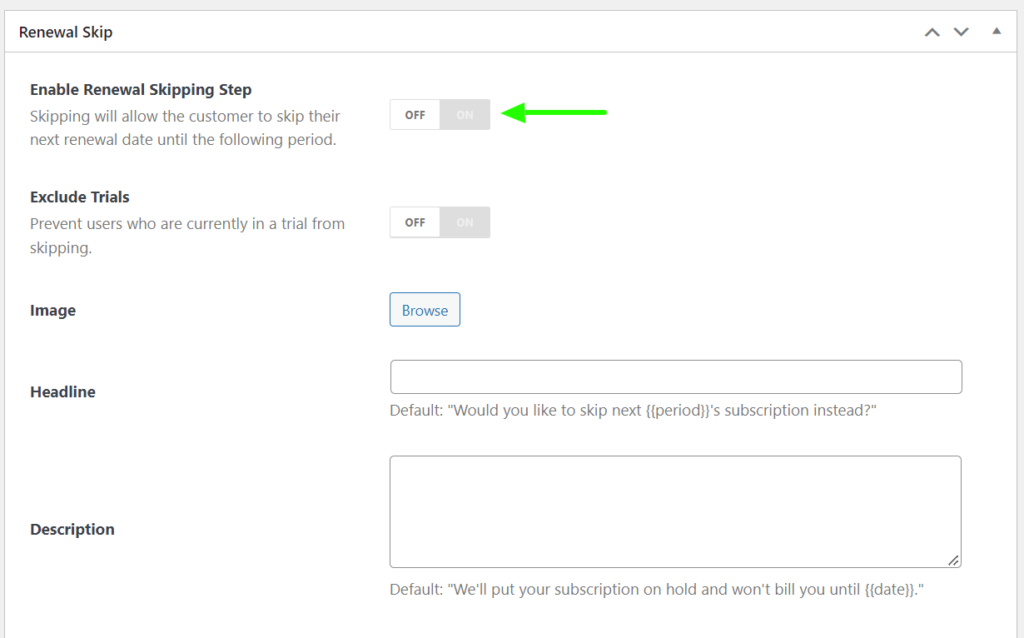
6. Decide if you’ll allow your customers to skip their subscription for a month. We’ve put default images and text in place, but you have the option to customize both screens for the Renewal Skip option.

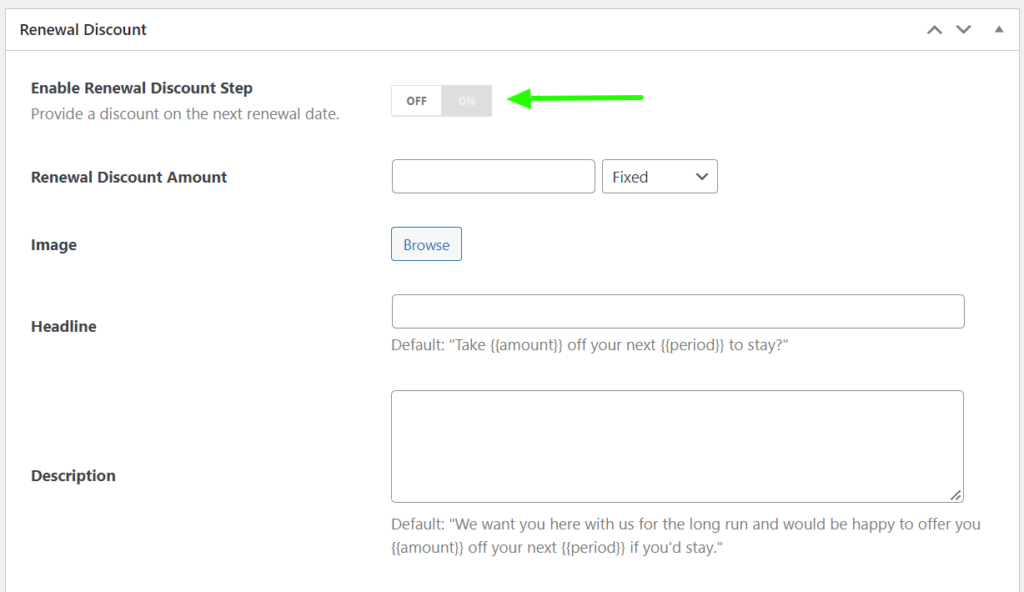
7. Choose if you want to display a renewal discount offer. Then add the percentage or fixed amount. We’ve put default images and texts in place, but you can customize both screens for the Renewal Discount.

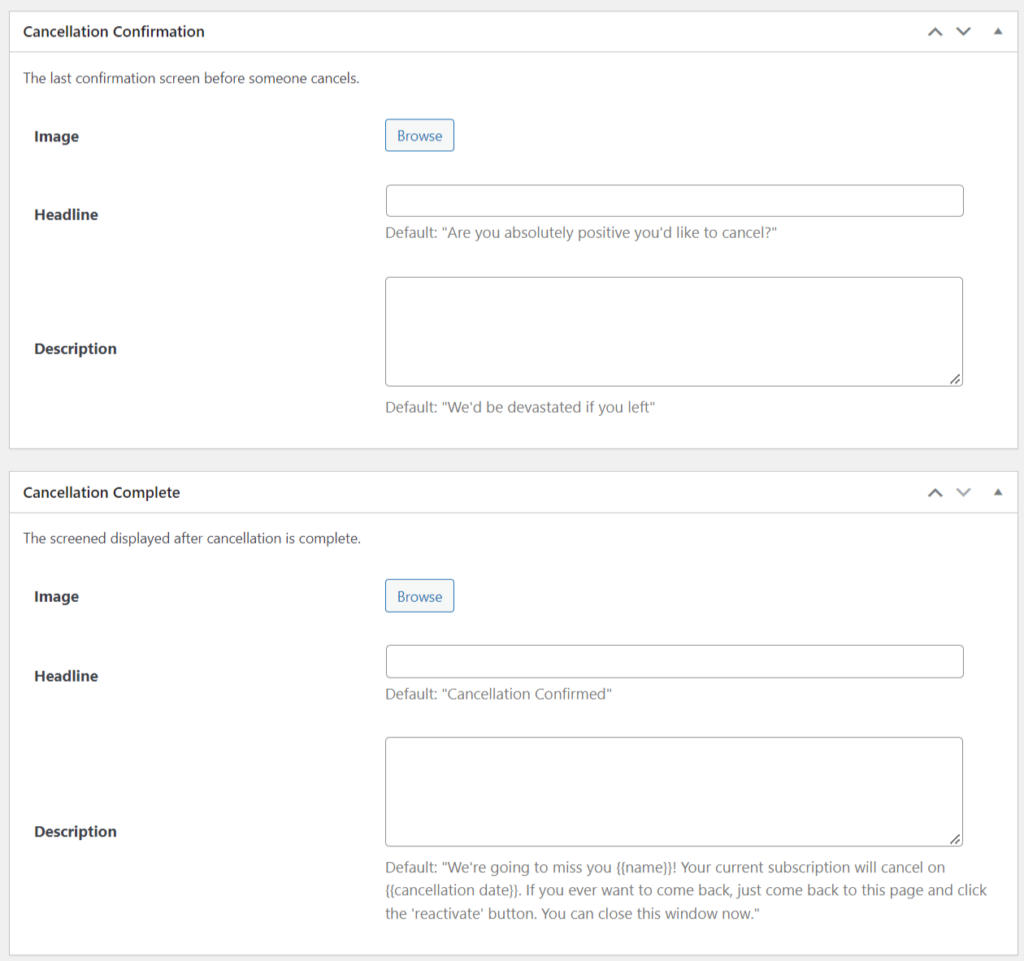
8. Customize the cancellation step screens with the images and text you’d like.

9. Finally, review your workflow and publish. You can check all your workflows by navigating to RetentionKit >Workflows

Next article: How to Integrate RetentionKit with Klaviyo